Novus Learn
Read structure with Visual Studio in Novus Learn
Visual Studio turns a source into a picture you can read, visuals whose shape comes from the underlying material rather than decoration bolted on afterward. This guide covers what it is for, the diagram types it renders, presentation mode, and how to read a visual the way you read a citation.
Some things are easier to see than to read. A sequence of events, the relationships between people or ideas, the way parts of a subject connect: these can be clearer as a picture than as paragraphs. Visual Studio, reachable at /visuals, is Novus Learn's attempt to offer that picture without giving up the one thing the rest of the app is built on: that what you see should trace back to a real source rather than being drawn to look convincing.
The governing idea is that a visual should earn its shape from the material. A diagram, a timeline, or a relationship view is meant to reflect structure that is genuinely present in the underlying source, so the picture becomes another way to read that source instead of a separate, unverifiable artifact. This guide explains what Visual Studio is for and how to use it well, and how to keep reading it with the same scepticism you bring to a cited sentence.
Contents
Two ways to finish
See the structure
Use a visual to read the shape of a subject the source already contains.
Keep it grounded
Cross-check the picture against the source and its citations before you trust its shape.
- 1
1. Understand what Visual Studio is for
Visual Studio exists to make structure legible. Much of what an encyclopedia article contains is relational (a timeline of events, a hierarchy, the connections between a subject and the things it cites or is cited by) and that relational shape is often buried in prose that describes it one sentence at a time. A visual can present the same structure at a glance, which is genuinely useful when the shape of a subject is the thing you are trying to understand.
The crucial constraint is that the picture is meant to be a reading of the source, not an illustration layered on top of it. A diagram in Visual Studio should reflect something that is actually in the material, so that looking at it is another way of reading the source rather than a detour away from it. That is what keeps Visual Studio consistent with the rest of Novus Learn: the same follow-the-source rule that governs the text is meant to govern the visuals too.
- Visuals are for structure: timelines, hierarchies, relationships between topics.
- The shape should come from the source, not be decoration added on top.
- 2
2. Open Visual Studio from a topic
Visual Studio lives at /visuals, and it works best approached the way everything in Novus Learn does, from a real, source-grounded topic rather than in the abstract. Start with a subject whose structure you actually want to see: something with a clear sequence, a set of relationships, or parts that connect in a way a picture would clarify. The visual is only as meaningful as the source it is reading, so choosing a topic with real structure to show is the first move.
Because it shares the app's foundations, opening a visual does not sign you into anything or leave a record of your reading on a server. It is the same local-first surface as the rest of Novus Learn, extended from reading the text of a source to reading its shape. Approach it as a companion to the article, not a replacement for it.
- 3
3. Read the visual as the source, not decoration
When a visual opens, read it the way you would read a cited passage: as something that should trace back to the material. Ask what structure it is claiming (this happened before that, these two things are connected, this sits under that) and treat those as statements you can check against the article and its references, not as decorative shapes to admire. A good source-grounded visual rewards that scrutiny, because the structure it shows is present in the source.
This is the habit that keeps Visual Studio honest in your own hands. A picture is persuasive by nature; it can make a shape feel authoritative simply by being clean and confident. The discipline is the same one you bring to the text: do not trust the picture because it looks convincing, trust the parts of it you can trace back to the source. Where a visual reflects the material, it is a fast way to understand; where it cannot, it should not pretend it does.
A source-grounded visual: the structure you see should trace back to the material, the same rule that governs the text. - 4
4. Know the diagram types and presentation mode
Visual Studio renders several distinct diagram types, and knowing which one a subject wants saves a lot of squinting. Hierarchies show what sits under what. Labeled systems show the parts of a thing and what each part is called. Scale comparisons put quantities against each other so an order of magnitude reads as a size rather than as a number with a lot of zeroes. Choose by what the source is actually doing: an article that spends its time on taxonomy wants a hierarchy, one that spends it on measurements wants scale.
There is also a full-screen presentation mode, which is more useful than it sounds. It turns a project into something you can teach from directly; pair it with the Teacher Hub at /teachers when you want the printable lesson as well. The same grounding rule still applies in presentation: what is on screen should trace back to the source, and a bigger diagram is not a more authoritative one.
- Hierarchies for taxonomy, labeled systems for parts, scale for quantities.
- Full-screen presentation mode for teaching straight from a project.
- Pairs with the Teacher Hub at /teachers for a printable, cited handout.
- 5
5. Use it alongside reading and citations
Visual Studio is at its best as a companion to the text, not a substitute for it. Use a visual to grasp the shape of a subject quickly, then move to the article to read the detail and follow the claims that matter to their citations. The picture tells you how the parts relate; the cited text tells you what is actually true about each part. Reading them together gives you both the structure and the evidence, which is more than either offers alone.
This pairing is where the "see the connections" side of Novus Learn comes through. When the material keeps its citations and its identity, the links between things are real rather than manufactured, and a visual is simply another way to read those links. Let the picture orient you and the sources ground you: understand the shape from the visual, and confirm the substance in the cited text.
- 6
6. Know where it is headed and where to get help
Visual Studio will grow, and the rule that governs the reading surface will govern the visuals as it matures: what you see should trace back to the source, and where it cannot, it should not pretend that it can. As coverage widens, expect more topics and more kinds of structure to become readable as pictures, but held to the same standard, so the visuals never drift into confident illustration with no return address, the very thing Novus Learn is built to avoid.
For the current, exact picture of what is live, the tool map at Tool maps lists Visual Studio alongside the nine input modes, the seven study artifacts, and the Teacher Hub. The guides at Help centre cover getting-started and the app's broader approach, and https://learn.novusstreamsolutions.com/help/troubleshooting is the place to turn if a visual does not behave as you expect. Where a source has no structure worth drawing, the source-grounded text is always there to read in full.
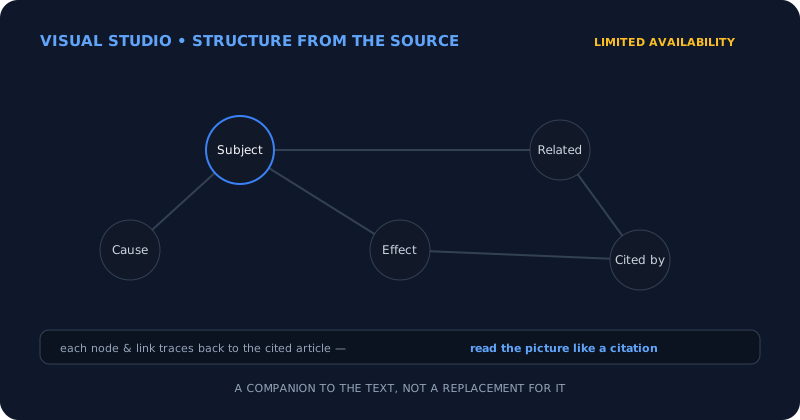
Let the picture orient you, let the source ground you
Visual Studio is for reading structure (hierarchies, labeled systems, scale comparisons, and the connections a subject already contains) as a picture that traces back to the source rather than decoration on top of it. Read a visual the way you read a citation, checking its shape against the source, and use it as a companion to the cited text rather than a replacement. Presentation mode makes it teachable; the Teacher Hub makes it printable.
Frequently asked questions
Quick answers to common questions about this topic.
What is Visual Studio in Novus Learn?
Visual Studio, at /visuals, presents a source as a picture you can read, a diagram, timeline, or relationship view whose shape comes from structure genuinely present in the underlying material, rather than decoration added on top. It is meant to be another way to read the source.
What kinds of diagram can Visual Studio draw?
Hierarchies for taxonomy, labeled systems for the parts of a thing, and scale comparisons for quantities, alongside the relationship and timeline views. There is also a full-screen presentation mode for teaching straight from a project. Which one fits depends on what the source actually spends its time on.
Can I trust the visuals?
Trust the parts you can trace back to the source, the same way you would read a citation. A source-grounded visual should reflect structure that is actually in the material; where it cannot, it should not pretend to. Use it alongside the cited text rather than in place of it.
Where can I see everything that is live?
The tool map at Tool maps lists Visual Studio alongside the nine input modes, the seven study artifacts, and the Teacher Hub. For help, Help centre covers getting started and the app's approach, and https://learn.novusstreamsolutions.com/help/troubleshooting is the place to go if a visual does not behave as expected.
Related workflow
From a source you can cite to a study pack you can hand out
Read from the source rather than a summary of it, then turn what you verified into a document someone else can use.
- Find the source and check the claim against itNovus Learn: The study material is extractive, not generative: what you get back is what the source says, which is the only kind you can safely cite.
- Assemble and finish the packNovus PDF Studio: Merge the pieces, add the fields a learner fills in, and sign it locally, so unpublished material stays unpublished.
Related troubleshooting
Was this page helpful?
Your answer stays in this browser, it is not sent anywhere and no account or cookie is involved.